|
(see also Protein Band Appearance > No Bands)
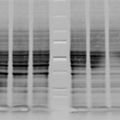
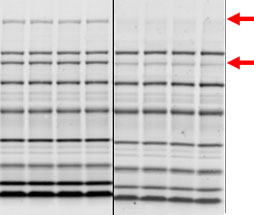
All bands appear very faint, or you see no signal with chemiluminescence or fluorescence detection.
|
 |
Protein transfer or binding issues
For more hints on how to improve transfer and binding, see also Troubleshooting: Transfer in the Protein Blotting Guide |
| Possible causes: |
Solutions: |
|
Insufficient sample loaded on the gel
|
- Check concentration of protein samples (e.g., using Bradford or Lowry protein assays)
- Increase the amount of source material
- Fractionate or concentrate the sample using one or more of these techniques:
- Optimize sample loading; see Determining the Appropriate Sample Load for Western Blots Protocol
|
|
Low transfer efficiency
(see below for more details on transfer power conditions, gel electrophoresis, and buffer preparation; see also Western Blotting > Transfer Conditions)
|
- Confirm transfer with Ponceau S staining
- Confirm transfer with Bio-Rad’s Stain-Free Imaging Technology
- Optimize transfer conditions for target protein size
- Lower gel acrylamide percentage
- Increase transfer time
- Optimize transfer buffers for methanol and SDS concentrations
|
|
Power conditions inadequate or transfer time too short
|
- Increase the transfer time (thicker gels require longer transfer times)
- Check the current at the beginning of the run; it may be too low for a particular voltage setting, indicating incorrect buffer composition. See the power guidelines for specific applications in Table 4.1 of the Protein Blotting Guide (Bulletin 2895)
- Use high-intensity blotting devices, e.g., Semi-Dry and Rapid Blotting Systems such as the Trans-Blot® SD or Trans-Blot® Turbo™ Systems
- Use a power supply with a high current limit such as the PowerPac™ HC Power Supply. If an incorrect power supply is used, it may not reach the set voltage if the current of the power supply is at its maximum limit
|
|
Power conditions too high or transfer time too long
- Low-MW proteins may be transferred completely through the membrane
- Proteins <15 kDa may show decreased binding to 0.45 µm membranes
|
- Reduce transfer time
- Decrease the voltage, especially if using a high-intensity transfer device, e.g., Semi-Dry and Rapid Blotting Systems such as the Trans-Blot SD or Trans-Blot Turbo Systems
- Place an additional membrane in the gel sandwich to detect any low-MW proteins that are transferred through the membrane
- Use PVDF or 0.2 µm nitrocellulose (smaller pore size)
|
|
Power supply circuit inoperative or an inappropriate power supply used
|
- Check the output capacity of the power supply to ensure the voltage and current output match the needs of the blotting instrument. If it does not match your needs, get a power supply with a higher current capacity such as the PowerPac™ HC Power Supply
- Check the fuse
|
|
Protein transferred away from the membrane
|
- Check that the gel/membrane sandwich has been assembled in the correct order
- Check the assembly of the transfer cell, and ensure that the cassette is inserted into the tank in the correct orientation
- Check the polarity of the connections to the power supply
|
|
Incorrect charge-to-mass ratio (native transfers)
|
- Use a more basic or acidic transfer buffer to increase protein mobility. A protein near its isoelectric point (pI) will transfer poorly (buffer pH should be 2 pH units higher or lower than the pI of the protein of interest for optimal transfer efficiency)
|
|
Protein precipitated in the gel due to
- High protein concentration
- Low solubility
- Partial folding/aggregation
|
- Use SDS in the transfer buffer. SDS can increase transfer efficiency but it can also reduce binding efficiency to nitrocellulose and affect reactivity of some proteins with antibodies
- Reduce or eliminate the alcohol in the transfer buffer
|
|
Gel percentage too high, decreasing transfer efficiency
|
- Reduce %T (total monomer) or %C (crosslinker) to increase gel pore size and increase transfer efficiency. Using 5% C (with bis-acrylamide as the crosslinker) produces the smallest pore size
- For example, generally protein gels are around 29:1 acrylamide-to-bis-acrylamide. If you are using 19:1, you should try 29:1. If you are examining a large complex and using 29:1, you may want to try 37.5:1 or try higher ratios. A higher acrylamide to bis ratio results in a gel with larger pores
|
|
Transfer buffer incorrect or prepared incorrectly
|
- Prepare fresh transfer buffer (for best results, never reuse transfer buffer)
|
|
Methanol in the transfer buffer inhibiting elution
|
- Reduce the amount of methanol. This may improve transfer efficiency of proteins from the gel but it may also decrease binding to nitrocellulose membranes; 20% methanol is generally optimal for protein binding
|
Detection issues
For more tips on resolving immunodetection problems, see also Troubleshooting: Detection in the Protein Blotting Guide
|
| Possible causes: |
Solutions: |
|
Primary or secondary antibody concentrations too low
|
- Repeat using higher concentration of antibody
- Optimize antibody concentration with dot blots
- Checkerboard screening protocols
|
|
Low antigen-antibody binding affinity
|
- Reduce the number of wash steps to a minimum
- Reduce wash stringency
- Increase the antibody concentration 2–4 fold higher that the recommended starting dilution
- Checkerboard screening protocols
|
|
Blot has been stripped and reprobed
|
- Redo blot because antigen may have been stripped off or damaged by stripping process
|
|
Film exposure time (ECL detection) too short
|
|
|
Nonfat dry milk may mask some antigens
|
- Decrease percentage (w/v) of milk in the blocking and antibody solutions
- Try alternate blocking solutions (e.g., albumin, gelatin, or BSA)
|
|
Insufficient sample loading
|
- Increase the amount of protein applied
- Concentrate the sample prior to loading
|
|
Detection system not working or not sensitive enough
|
- Use a more sensitive assay system
- If using colorimetric detection try an enhanced chemiluminescent substrate (ECL) such as Bio-Rad’s Clarity™ ECL Substrate
- If using alkaline phosphatase (AP) conjugate, try a horseradish peroxidase (HRP) conjugate instead (see our selection of HRP and AP Conjugates)
- If using a general ECL substrate, try a high-sensitivity ECL substrate
- Include proper positive and negative control antigen lanes to test for system sensitivity; consult your detection kit manual
|
|
Proteins washed from the membrane during assays
|
- Reduce the number of washes or reduce the stringency of washing conditions during subsequent assay steps
- Reduce the time of each wash step
- Reduce washing temperature
- Reduce the concentration of detergent (usually Tween 20) in the wash buffer, or remove it entirely from the wash buffer
- Reduce the salt concentration in the buffer
|
|
Insufficient antigen binding to the membrane
|
- Stain the blot after transfer or use prestained standards to assess transfer efficiency. Alternatively, use stain-free technology to assess sample being on the blot.
- See the previous section for suggestions on improving transfer-related problems
|
|
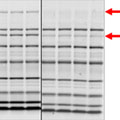
Antigen denaturation during electrophoresis or transfer
|
- Antibodies, especially monoclonals, may not recognize denatured antigens. If this is the case, electrophorese and transfer proteins under native conditions, e.g., blue native PAGE. Use a cooling coil and a refrigerated recirculating bath to transfer heat-sensitive proteins
|
|
Epitope blocked by total protein stain
|
- Some total protein stains (such as amido black and colloidal gold) interfere with antibody recognition of the antigen. Try a different stain (e.g., Ponceau S) or Bio-Rad’s Stain-Free Technology
|
|
Primary or secondary antibody inactive or nonsaturating
|
- Store the reagents at recommended conditions in small aliquots to avoid repeated freeze-thaw cycles, bacterial contaminants, and heat inactivation
- Detergents may affect the binding of some antibodies. Eliminate them from the assay, except for the wash after blocking
- If the antibody titer is too low, optimize the concentrations using a dot-blot experiment (see Protein Blotting Guide: Microfiltration)
- Optimize antibody concentrations using a checkerboard protocol.
- Increase the antibody incubation times
- Test the activity of the first antibody solution. Use an ELISA, RID, Ouchterlony immunodiffusion, or precipitation test to determine the reactivity of the antibody with the antigen. If possible, repeat the assay procedure with a more concentrated primary antibody solution
|
|
Chemiluminescence substrate or color development reagent inactive
|
- Test the activity of the color development solution by combining 1.0 ml of the color development solution with 10 µl of full-strength secondary antibody conjugate. The color reaction should occur immediately. If color fails to develop within a few minutes, the color development solution is inactive. Prepare a fresh working solution and repeat the color development assay
|
|
Enzyme conjugate inactive or nonsaturating
|
- Test the activity of the conjugate solution by combining 1.0 ml of the color development solution tested above and 1.0 ml of the 1:3,000 dilution conjugate solution. A light-blue tinge should develop within 15 min. If color fails to develop within 25 min, the conjugate solution is suspect. Repeat the procedure with a freshly prepared dilution of conjugate
- Store the reagents at recommended conditions. Avoid repeated freeze-thaw cycles, bacterial contaminants, and heat inactivation
- Sodium azide inactivates horseradish peroxidase. Use a different biocide such as gentamicin sulfate instead
- Undistilled water may cause inactivation of the enzyme. Use only distilled, deionized water
- If the conjugate concentration is too low, optimize using a dot-blot experiment (see Bio-Dot® and Bio-Dot SF Microfiltration Apparatus)
- Optimize antibody concentrations using a checkerboard protocol
|